Today, I had a client come into the salon, asking for a change. Her hair was in good condition, but it wasn't doing much, and for a single lady, we thought her hair could be doing a lot more for her beautiful face.
Her current style was that which I refer to as the "swingback" bob.

I decided to stay with the general bob shape, but to add much more movement and create disconnection and asymmetry. The rest of the article will explain in depth (step by step) how this cut is executed.
Preparation and Sectioning
Note: Much of this process will involve references of the head anatomy. Make sure you understand and are familiar with the anatomy before beginning.
- The hair is prepared with Redken Color Extend Shampoo, to bring out the color done on the client earlier.
- The hair is conditioned with Redken Real Control Conditioner which is used as a cutting agent, allowing for a smooth yet bodied finish.
- The hair is combed back entirely, into the pre-section shape (shown below).
- An off-center profile parting is established over the middle of one eyebrow, taken from the front hairline to the crown. See image below.

Off-center Profile Parting
- A horizontal cross-section parting is taken from the back end of the profile parting, running from the profile to slightly behind each ear. This separates the top and crown sections. See image below.
- Establish a central vertical parting, beginning at the crown, down to the nape hairline. This will isolate two back sections, back left and back right.
- From the central horizontal parting, along the parietal ridge, a slightly curved section is taken from the central area of the parietal ridge to the central vertical parting in the back of the head. This is done on both sides, establishing two triangular upper crown sections, and isolating the nape area. An aerial view should look similar to the image below.
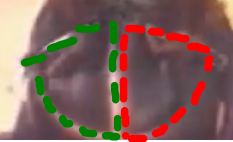
- A 45 degree diagonal section is taken from one inch from the front hairline along the profile, towards the back of the head (it should lead away from the profile on the side of the head with more hair). This will isolate another triangular section. See the image below.
- From the point where you began your previous section, section off another triangle in the same way, but at a steeper angle. This triangular section will also be much smaller than the one taken in step 8. See image below.
- The sectioning process is now complete. Be sure to check that all the sections are straight and clean. Review the images below for consistency.
 |
| Presection Shape. |


Cutting: Interior
Let's cut some hair!
Note: Many of the techniques used in this haircut are advanced. Make sure you are familiar with techniques such as (but not limited to): overdirection, elevation, point-cutting, and slide cutting. It is also important that you are able to complete this haircut successfully on a mannequin several times before attempting it on a real person.
- Take down one of the crown sections. Divide the section into a half inch wide subsection. Elevate the subsection to forty-five degrees, overdirecting backward, and cut to the desired length on a square line. Use blunt cutting technique, in a chopping method (open the blades wide, and close them hard, using the first third of the blade to cut)
- Take parallel sections from this area as many times as necessary and repeat step 1, using small portions of each cut subsection as a guide.
- Re-pin the cut section.
- Repeat steps one, two and three (in that order) for the other crown section (though leave a small portion of the previous guide unclipped, as it will be used for this section).
- Once both crown sections have been cut, unclip both sections, and check for balance visually.
- Take down the larger of the top triangle sections. 3/4-1 inch subsections are taken horizontally, beginning at the back. The subsection will again be elevated to forty-five degrees and overdirected towards the back. Cut using the guideline established in step one, again referencing the techniques and guidelines outlined in step 1.
- Repeat step 6 as many times as necessary.
- The small triangular top section is now taken down. Cut following steps 6 and 7.
- Reestablish the central vertical nape parting. From the center of the nape, take a half-inch vertical subsection. Elevate the section to ninety degrees (parallel to the floor) and cut to the desired length (follow your guide from the interior layering if necessary). This subsection will be used as a pivoting guide around the headshape. Do NOT follow this guide into the top area. That area has already been cut and should not be affected by this step. Re pin the sections if necessary as a visual aid to help you know where to cut (strongly recommended).
- Repeat step one all the way around the back of the head, following the headshape (do not go past the central vertical division along the ear).
- Establish a baseline. Comb all the hair in the back straight down, very close to the head. Cut a "U" baseline, following the shape of the neck and arcing up slightly (angle is your choice) towards each ear. Use of point or blunt cutting is your choice (point is easier, to be refined later).
- Half to one inch past the central vertical division along the ear, section down from the parietal ridge to the side hairline. Pull all the hair in that section back, along with some hair previously cut as guide, and over direct up and back, to a forty-five degree angle. Cut on a square line.
- Make sure that each section is continued across the headshape (towards the off-center profile, but not past it) and cut according to the guide set in the crown.
- Repeat steps 4 and 5 until you reach the side hairline.
- Repeat steps 4 and 5 on the other side.
- Re-wet the hair.
- On the shorter side, extend and refine the baseline visually, point cutting with zero elevation along the face-shape, following and extending the outline angle previously set in step 3. Don't worry if you're cutting a lot of hair in this step. This is establishing the base shape, while most of the previous steps established internal shape.
- On the longer side, follow step nine until you reach the bottom corner of the jaw. As this point is reached, the baseline will curve back down, following the angle of the jawbone. This step creates asymmetry.
- Prepare the hair for drying. Make sure that the hair is damp (if it is not, wet it again with a spray bottle), and apply Satinwear 02 Lotion as a drying agent. Rootful 06 Root Lifting Spray is applied as a root lifter.
- Blow dry the hair using a Denman Brush. When the hair is damp, brush it in the opposite direction of which it is meant to fall, thus resulting in root lift, and then blow dry into place.
- Repeat step twelve as desired.
- Refine the baseline once again, this time using slicing techniques. Slice close to the nape hairline, being sure not to completely close the blades, and removing small amounts of hair at a time.
- For softness, point cut along the baseline.
- Finish the haircut as you see fit (tousling, etc.). Notice that the front section of the hair can be combed to either side, one showing a more exaggerated asymmetry.
- Make sure your client likes their hair!


No comments:
Post a Comment